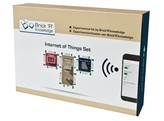
With the Internet of Things set it is possible to control your bricks via the Internet. With the included IoT Brick you will learn how to build your first website and control I/O pins via smartphone. Furthermore, the set contains a temperature and humidity sensor. To drive the 7-segment display, the so called I²C bus is used. With this set your first home automation project can be realised.
Benefits
All projects created by Brick'R'knowledge sets can now be controlled via the Internet
Control via Smartphone
Coding with the Arduino IDE
Easy to use plug-in system which does not distract from programming the microcontroller and the components which it controls
Save to use and robust
Screen-printed electric symbols on top of each brick
No additional material required
Equipment and Technical Data
Realise the following projects:
Basic knowledge: IoT brick and Arduino IDE, "Hello World", push buttons and LEDs, I2C bus and 7-segment display, OLED display, analog inputs
Set up IoT brick as a WiFi client
Retrieve the time from the Internet
Measure temperature and humidity
Retrieve currency exchange rate from the Internet
My first website
Setting up connections via your website
The stable storage box includes the following components and bricks which can be easily attached to one another: IoT-Brick ESP8266 with WiFi interface, 4MB flash memory and internal WiFi antenna, OLED display for IoT brick, I2C 7-segment display, potentiometer, dual LED (red/yellow), diverse connecting bricks, external sensor adapter for 3, 4 and 5 pins, ground brick to realise closed circuits easily and to reduce the number of necessary connections, short-circuit-proof power supply (9V) with wall power supply, temperature and humidity sensor on circuit board (sensor type DHT11, 0...50°C, 20...95% rel. humidity), USB cable to connect the IoT brick with the computer.
Additonally required:
For coding and data transfer of the code to the IoT brick a PC is required (Windows, MacOSX, Linux).
Eigenschaften
- 138090/BRK
- BRK-138090

